
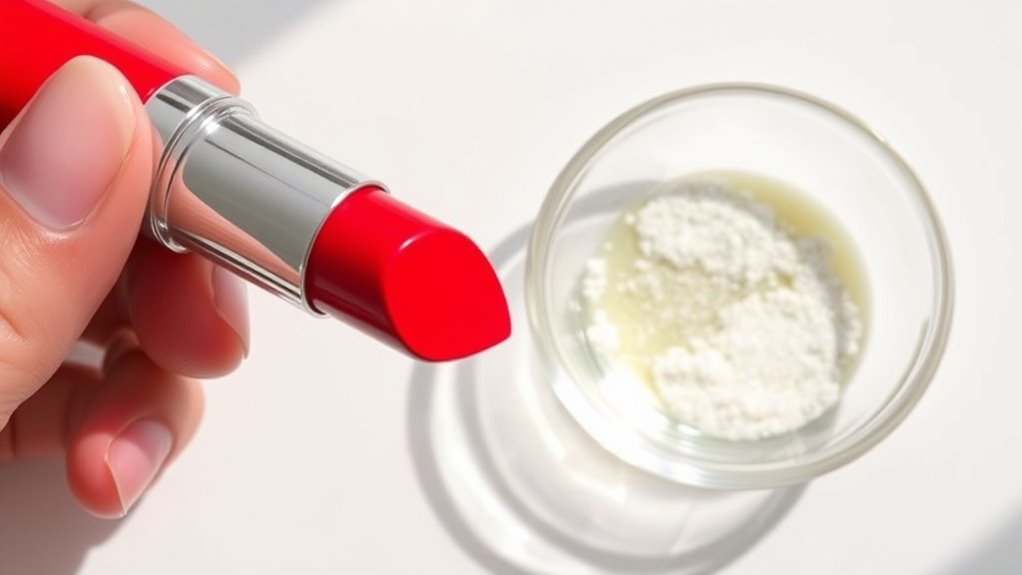
To make your lipstick transfer-proof with a simple kitchen ingredient, try using cornstarch or baking soda. After applying your lipstick, gently blot your lips with a tissue, then dust a small amount of cornstarch or baking soda over your lips using a brush or sponge. This absorbs excess oils and helps set the color for a longer-lasting, smudge-resistant finish. Keep going to discover step-by-step tips for perfect, lasting lips.
Key Takeaways
- Use cornstarch or baking soda as a natural setting powder by applying a thin layer over lipstick to prevent transfer.
- Blot lips with tissue after initial application, then dust cornstarch or baking soda to lock in color and reduce smudging.
- Exfoliate and hydrate lips beforehand for smoother application and better adherence of the kitchen ingredient-based setting method.
- Reapply lipstick after dusting with cornstarch or baking soda for enhanced durability and transfer resistance.
- Combine with proper lip prep and setting techniques for a long-lasting, transfer-proof lipstick finish using just a kitchen ingredient.
Discovering the Secret Kitchen Ingredient

Many people overlook the potential of common kitchen ingredients in creating long-lasting makeup solutions. One secret kitchen ingredient can markedly improve lipstick longevity and make your color stay put all day. This simple kitchen hack involves using a small amount of cornstarch or baking soda, which acts as a natural matte finish enhancer. When applied correctly, it absorbs excess oils and helps set your lipstick, preventing transfer and smudging. You might be surprised to learn how versatile and effective these everyday items can be in your beauty routine. Incorporating this secret ingredient is easy, affordable, and doesn’t require special products. Additionally, understanding electric power generation can help you appreciate how energy-efficient tools like bike generators work to support sustainable practices. With just a few tweaks, you’ll discover how kitchen hacks can transform your lipstick’s staying power and give you a flawless, transfer-proof look.
Preparing Your Lips for Long-Lasting Color
To guarantee your lipstick stays put all day, start by preparing your lips properly. Good lip prep enhances color longevity and creates a smooth base for application. Begin by gently exfoliating your lips to remove dry, flaky skin—this ensures even coverage and prevents patchiness. Follow with a light layer of moisturizer or a lip balm, then blot away any excess to avoid slipping. Applying a lip primer or a bit of translucent powder can also help set the lips and absorb excess oils. These steps create a matte, velvety surface that grips lipstick better. Additionally, understanding the importance of surface preparation can greatly improve the effectiveness of your long-lasting lipstick application. When your lips are properly prepped, your chosen lipstick will last longer and resist transfer, giving you a flawless, long-lasting look throughout the day. Incorporating proper skincare routines into your lip prep can further enhance the adherence of your lipstick. Staying informed about technological advancements in cosmetic products can also introduce innovative tools that support long-lasting makeup.
Applying Your Favorite Lipstick for Best Results

Once your lips are properly prepped, applying your favorite lipstick with precision guarantees a polished, long-lasting finish. Focus on starting at the center of your lips and working outward, using smooth, even strokes. For better lipstick longevity, consider using a lip brush for more control and definition. Don’t forget to blot excess product gently with a tissue to avoid uneven application. Kitchen remedies can help enhance this process—like applying a light layer of balm beforehand or using a small amount of petroleum jelly for a smoother glide. Carefully filling in your lips ensures the color stays put longer and looks flawless. Taking your time during application minimizes smudging and helps achieve a professional look that lasts all day.
The Step-by-Step Process to Lock in Your Lip Color
After applying your lipstick with care, the next step is to lock in the color for maximum staying power. Start by blotting your lips gently with a tissue to remove excess product. Then, use a clean makeup tool, like a lip brush or a fine sponge, to apply a thin layer of translucent powder over your lipstick. This helps set the lipstick formulas and reduces transfer. Press a tissue against your lips and dust the powder through it for an even finish. For extra durability, repeat the process: apply another layer of lipstick, blot again, and add powder. This step-by-step method ensures your lip color stays put longer and resists smudges, giving you a transfer-proof finish that lasts all day. Incorporating performance cookies can also help analyze how well your lipstick lock-in method is working by tracking user engagement. Additionally, choosing formulas that are mineral-based can contribute to a more natural and skin-friendly finish. Using a matte finish lipstick can further enhance longevity, as it typically adheres better to the lips and resists transfer more effectively.
Tips for Fixing and Touching Up Throughout the Day
Throughout the day, your lipstick may start to fade or transfer, but quick touch-ups can keep your look fresh. To preserve lipstick longevity, keep a small mirror and your preferred lip product handy. Gently blot your lips with a tissue to remove excess oils, then reapply a thin layer of lipstick for a seamless finish. Incorporate a light dusting of translucent powder over your lips to set the color and improve staying power. Following a consistent lip care routine, like exfoliating and moisturizing, also helps prevent uneven fading. Additionally, understanding transfer-proof techniques can further enhance your lipstick’s durability and help you achieve a more long-lasting finish. For optimal results, selecting lip products with long-lasting formulas can make a significant difference. Using setting sprays or powders designed for lips can also double the wear time of your lipstick. Use the table below for quick reference:
| Tip | Technique |
|---|---|
| Blot | Remove excess moisture and oil |
| Reapply | Use a thin layer for natural look |
| Set | Light powder for longevity |
| Maintain | Regular lip care routines |
These simple steps ensure your lipstick stays vibrant all day.
Common Mistakes to Avoid When Making Lipstick Transfer-Proof
One common mistake is overapplying the kitchen ingredient, which can cause uneven texture and reduce transfer-proof effectiveness. Skipping patch tests might lead to skin reactions or poor results later on. To get the best outcome, use the right amount and always test a small area first. Additionally, paying attention to the glycolic acid concentration can help tailor your approach and improve results. Being aware of product formulation can also influence how well the ingredient works and its compatibility with other products. Proper raw food storage methods can ensure the ingredient remains fresh and effective.
Overapplying the Ingredient
Overapplying the kitchen ingredient can actually do more harm than good when trying to achieve a transfer-proof lipstick. Too much product can make your lips look cakey, uneven, or cause smudging, which undermines lipstick longevity. To avoid this, use only a thin, even layer. Here are some tips:
- Apply sparingly: A light coat ensures better adhesion and a natural finish.
- Avoid layering excessively: Multiple layers can cause pilling and reduce the effectiveness of kitchen hacks.
- Blot excess: Gently press a tissue to remove surplus product, preventing buildup that can lead to smudging.
- Hydration plays a role in maintaining smooth, healthy lips, which can enhance the effectiveness of your transfer-proof technique. Additionally, lip preparation with a gentle exfoliant can help create a smoother surface for better results and support overall lip health, which is important for spiritual energy and well-being.
Skipping Patch Tests
Skipping patch tests can lead to unexpected allergic reactions or irritation that may compromise your lipstick’s appearance and longevity. A patch test helps you identify sensitivities to ingredients involved in making your lipstick transfer-proof. Without it, you risk allergic reactions that can cause swelling, redness, or peeling, affecting how your lipstick looks and sticks. If your skin reacts poorly, your lipstick’s longevity may decrease, or you might develop blemishes that are hard to cover. Always perform a patch test on a small skin area before applying a homemade or altered lipstick routine. This simple step guarantees your skin tolerates the ingredients and helps you achieve the desired transfer-proof effect without unwanted side effects. Additionally, Pimple Patches are designed to absorb impurities and reduce inflammation, which can be beneficial if you experience skin irritation. Protect your skin and boost your lipstick’s durability by never skipping this essential step. Understanding skincare ingredients can also help you choose the safest products for your routine. Incorporating knowledge about relationship dynamics can help you better understand your skin’s reactions and needs, ensuring a safer cosmetic experience.
Enhancing Your Lip Look With Complementary Makeup Tips
To make your lipstick stand out and last longer, pairing it with complementary makeup can create a polished and harmonious look. Achieving lipstick longevity depends on well-coordinated makeup that enhances your features without overshadowing your lips. Here are three tips to boost makeup harmony:
- Use neutral eyeshadows to keep the focus on your lips, ensuring a balanced look.
- Apply a subtle blush that complements your lip color, adding warmth without overpowering.
- Define your eyebrows neatly to frame your face and draw attention to your smile.
These steps help create a cohesive appearance, making your lipstick pop and last longer throughout the day. When your makeup is in harmony, your overall look appears effortless and chic.
How to Remove Transfer-Resistant Lipstick Safely
After achieving a flawless, transfer-resistant lipstick look, removing it without damaging your lips is key. To preserve lipstick longevity and ensure ingredient safety, use gentle methods like makeup remover wipes or micellar water. These remove stubborn formulas effectively without harsh scrubbing. Avoid abrasive tools or strong chemicals that can strip your lips’ natural moisture or cause irritation. If you prefer a natural approach, a soft cloth dampened with warm water can loosen the product safely. Always follow up with a nourishing lip balm to replenish moisture. Remember, the goal is to break down the lipstick’s bonds delicately while protecting your lips’ delicate skin. With proper removal techniques, you can maintain healthy lips and keep your skin safe from unnecessary irritation.
Additional Hacks for a Perfect, All-Day Lip Finish

Achieving a flawless, all-day lip finish requires more than just applying your favorite lipstick; it involves strategic techniques to keep your lips looking fresh and vibrant throughout the day. To boost lipstick longevity, incorporate these kitchen secrets into your routine:
- Use a lip primer or a tiny bit of foundation on your lips before applying lipstick. This creates a smooth base, helping color stay put longer.
- Blot your lips with a tissue after the first application, then reapply a thin layer of lipstick. This sets the color and reduces transfer.
- Dust a little translucent powder over your lips through a tissue. This mattifies and locks in the color, ensuring your lipstick remains vibrant and transfer-proof all day.
Frequently Asked Questions
Can This Kitchen Ingredient Harm Sensitive Skin or Cause Allergies?
You might wonder if this kitchen ingredient can cause allergic reactions or skin irritation. While generally safe for most, sensitive skin could react, leading to redness or itching. Always do a patch test before applying it broadly, and avoid if you notice any discomfort. If you experience allergic reactions or skin irritation, discontinue use immediately and consult a dermatologist to prevent further issues.
Will This Method Work With All Lipstick Formulas and Finishes?
Imagine your lipstick as a chameleon, changing to fit its environment. Will this method work with all formulas and finishes? It depends, since ingredient versatility varies and not every lipstick plays nice with the same fixative. Matte, gloss, or satin—each has unique properties that can affect compatibility. To guarantee a smooth ride, test on a small area first, and be prepared for some formulas to resist the transfer-proof magic.
How Long Does the Transfer-Proof Effect Typically Last?
The transfer-proof effect usually lasts several hours, but it varies depending on your lipstick’s transfer longevity and ingredient stability. If your formula is highly pigmented and long-wearing, the effect can last longer. Keep in mind, eating or drinking may reduce the transfer-proof duration. To maximize longevity, opt for stable ingredients, and reapply as needed. This way, you enjoy a smudge-proof look throughout your day.
Is This Hack Suitable for Use With Lip Gloss or Only Matte Lipsticks?
This hack is a game-changer, but is it suitable for lip gloss or just matte lipstick? Typically, matte lipsticks work best because their dry texture holds up longer and is more compatible with this trick. Lip glosses, being more hydrating and shiny, may not stay transfer-proof as effectively. So, if you’re aiming for long-lasting wear, stick with matte, but feel free to experiment with lip glosses to see how they hold up.
Can This Technique Be Combined With Other Long-Wear Lip Products?
You can definitely combine this technique with other long-wear lip products through lipstick layering. To guarantee ingredient compatibility, apply the transfer-proof layer after your base, then add gloss or other products on top carefully. This way, you maintain the long-lasting effect while adding shine or color variations. Just avoid mixing incompatible formulas, and always let each layer set for the best transfer-proof results.
Conclusion
Now you’re all set to conquer the world with lips that stay flawless and kiss-proof all day long! With just one simple kitchen ingredient, you’ve *discovered* the secret to a lipstick that defies gravity, smudges, and even the strongest coffee. Say goodbye to constant touch-ups and hello to a perfect pout that lasts through laughs, meals, and even your most epic dance moves. Get ready to turn heads—your lips will be unstoppable!