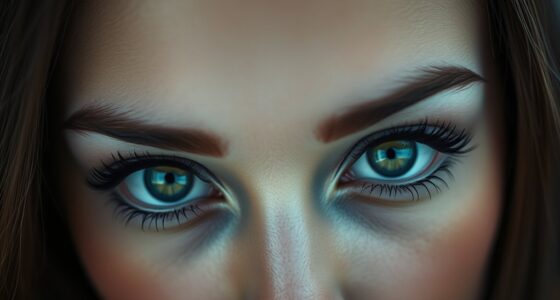
For flawless eyeliner, start by choosing the right formula for your look, like gels for versatility or pencils for a softer effect. Prep your eyelids with primer to create a smooth base, and use tape or a card to achieve sharp wings. Use small, steady strokes to build precision and correct mistakes with a cotton swab dipped in makeup remover. Setting with powder and practicing regularly can elevate your results—continue exploring tips to perfect your technique.
Key Takeaways
- Use eyelid primer and hydrate skin for a smooth base and better eyeliner adherence.
- Apply tape or a card at the outer corner to achieve sharp, clean winged lines.
- Draw with steady, small strokes, gradually building up the eyeliner for control and precision.
- Correct mistakes with a cotton swab dipped in makeup remover for a flawless finish.
- Set your eyeliner with translucent powder or setting spray to enhance longevity and prevent smudging.

NYX PROFESSIONAL MAKEUP Ultimate Shadow & Liner Primer, Eyeshadow & Eyeliner Primer – Light
Vegan Eye Primer: Infused with vitamin E to extend makeup wear, use this primer under eyeshadow and eyeliner…
As an affiliate, we earn on qualifying purchases.
As an affiliate, we earn on qualifying purchases.
Choose the Right Eyeliner Formula for Your Look

Choosing the right eyeliner formula is essential to achieving your desired look and ensuring comfort throughout the day. There are various types of eyeliners, including pencil, gel, liquid, and pen, each offering different finishes and ease of application. For a natural, subtle effect, a pencil liner might be best, while liquid liners create bold, precise lines. Gel liners are versatile and long-lasting, perfect for smoky looks. When it’s time to remove your eyeliner, knowing effective eyeliner removal methods helps prevent damage to your delicate eyelid skin. Oil-based removers work well for waterproof formulas, while gentle micellar waters suit most types. Picking the right formula not only complements your style but also makes removal easier, keeping your eyes healthy and comfortable. Incorporating essential oils for eye health into your routine can also support the overall condition of your eyelids and lashes. Additionally, selecting formulas that are compatible with sensitive eyes can prevent irritation and discomfort. Using proper application techniques can also help extend the wear and reduce smudging or irritation throughout the day. To further enhance your eye health, consider maintaining a remote work lifestyle that reduces eye strain and encourages regular breaks from screens.

wet n wild Mega Last Breakup Proof Waterproof Retractable Gel Eyeliner – Ultra Pigmented 16-Hour Long Wear, Smudge Proof Satin Finish Formula, Cruelty-Free & Vegan – Charcoal
Waterproof Eyeliner: This ultra pigmented eyeliner delivers smudge proof, flake proof, cry proof color with a satin gel…
As an affiliate, we earn on qualifying purchases.
As an affiliate, we earn on qualifying purchases.
Prep Your Eyelids for a Smooth Application
To make certain your eyeliner glides on smoothly and stays put all day, it’s essential to properly prep your eyelids beforehand. Start by applying a thin layer of eyelid primer to create a smooth base and prevent creasing. This eyelid priming step helps your eyeliner adhere better and last longer. Next, ensure your skin is well-hydrated; moisturized eyelids reduce dryness and flakiness that can interfere with a clean line. Use a gentle eye cream or moisturizer, letting it absorb fully before applying primer. Hydrated skin creates a seamless surface, making eyeliner application much easier. Additionally, skin analysis technology can assist in analyzing your skin type and recommending optimal products for your eyelid condition. For example, a tailored skincare routine can address specific concerns like oiliness or dryness to help customize your prep routine. Proper prepping guarantees a flawless, smooth finish that stays crisp throughout the day and can improve the longevity of makeup.

Physicians Formula Eye Makeup Remover Coconut Milk Waterproof Eye Makeup Remover, Dermatologist Tested, Oil-Free, for Sensitive Skin, 2 Fl Oz (Pack of 1)
GENTLY REMOVE MAKEUP: You can trust Physicians Formula to make a nourishing, non-irritating eye makeup remover that easily…
As an affiliate, we earn on qualifying purchases.
As an affiliate, we earn on qualifying purchases.
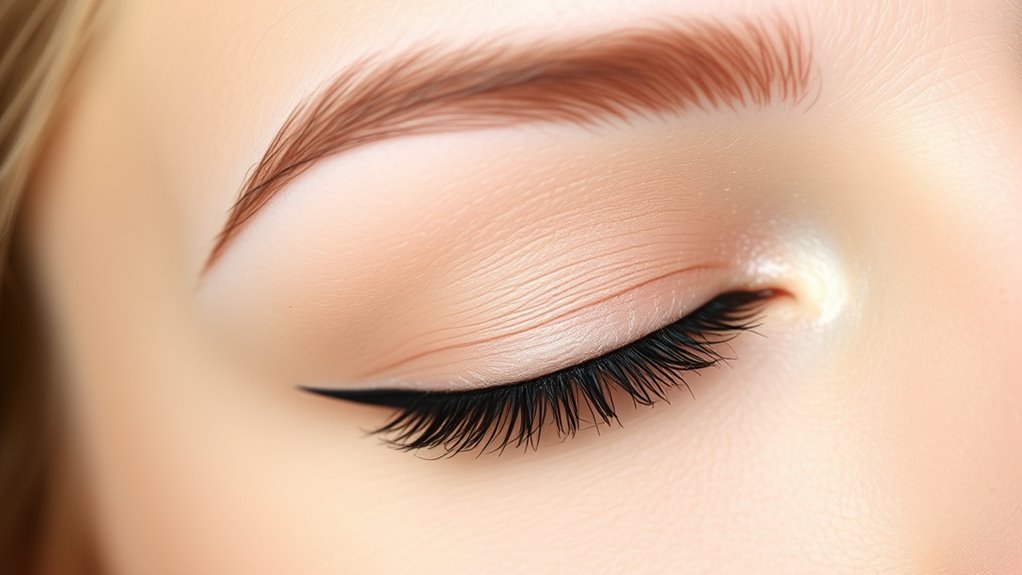
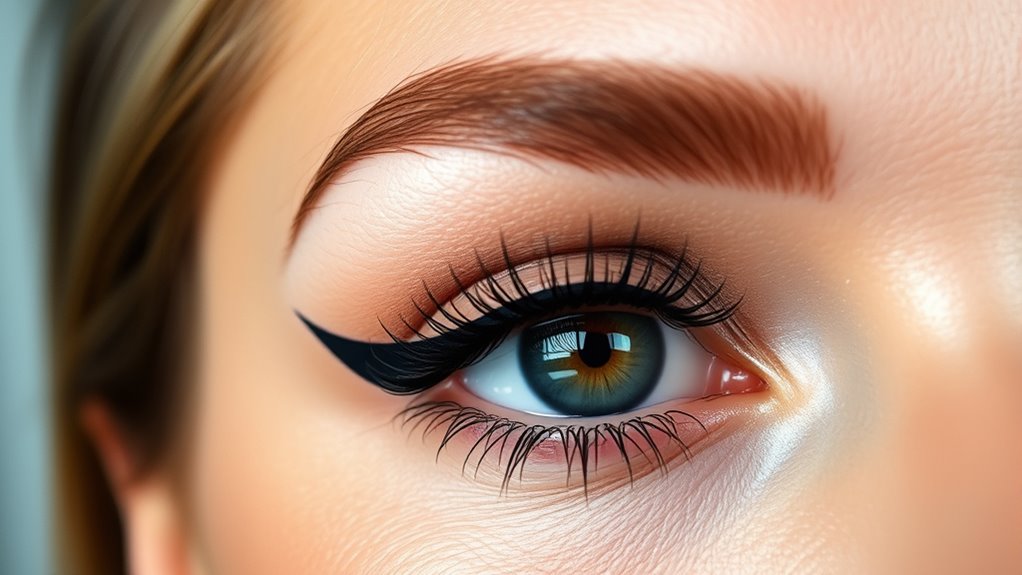
Use Tape or a Card to Achieve a Sharp Wing
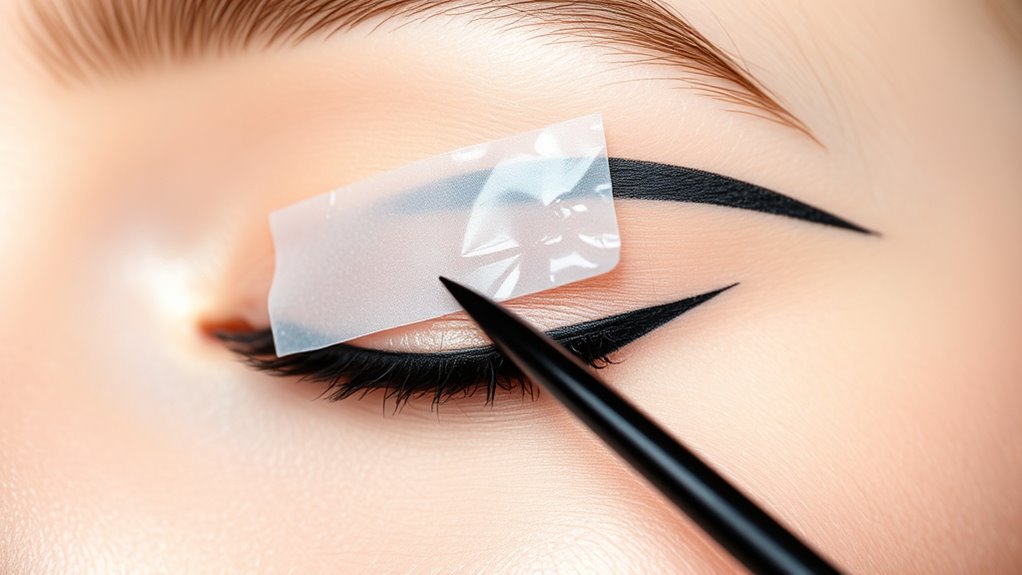
Using tape or a card is an easy way to create a precise, sharp wing for your eyeliner. Tape tricks and card techniques help you achieve a clean, professional look effortlessly. First, place the tape or card at the outer corner of your eye, angling it towards your eyebrow tail. Then, follow these tips:
Create a flawless winged eyeliner with tape or a card for sharp, professional results.
- Use painter’s tape or a sticky tape for better adhesion.
- Choose a card with a straight edge for a crisp wing.
- Press the tape gently to avoid smudging.
- Fill in the wing with your eyeliner, following the edge of the tape or card.
- Remove the tape or card carefully to reveal a flawless wing.
- For an even more polished look, ensure your eyelid surface is clean and free of oils before applying the tape or card, as a smooth surface helps the eyeliner adhere better and creates sharper lines. Additionally, WWE Raw’s financial impact demonstrates how precise branding and presentation can elevate a product or look to a higher standard.
These methods help you control the shape and sharpness, making your eyeliner look sharp and symmetrical every time.
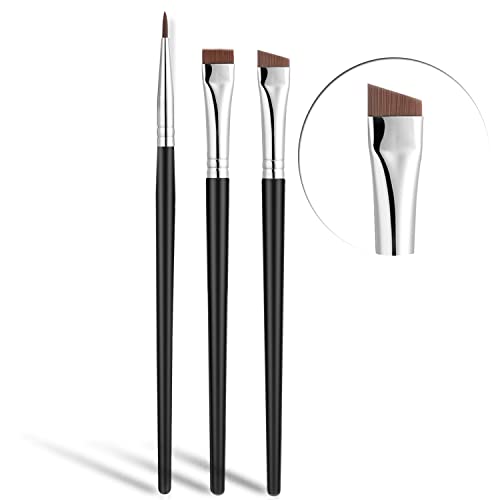
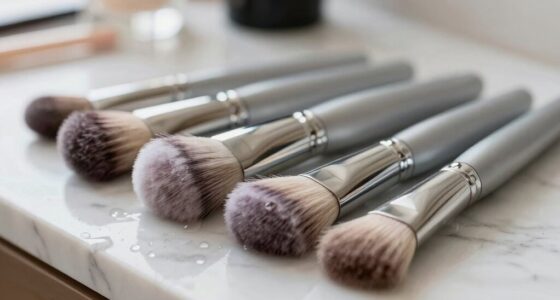
Fine Angled Eyeliner Brush, JASSINS Ultra thin Precision EyeLiner Makeup Brushes Set, Fine Point Eyeliner Brush, Synthetic Bristles Eye Makeup Tool (3 Pcs)
3 PACK ANGLED EYELINER BRUSH: You get three very quality professional eyeliner brushes, a fine point eyeliner brush,…
As an affiliate, we earn on qualifying purchases.
As an affiliate, we earn on qualifying purchases.
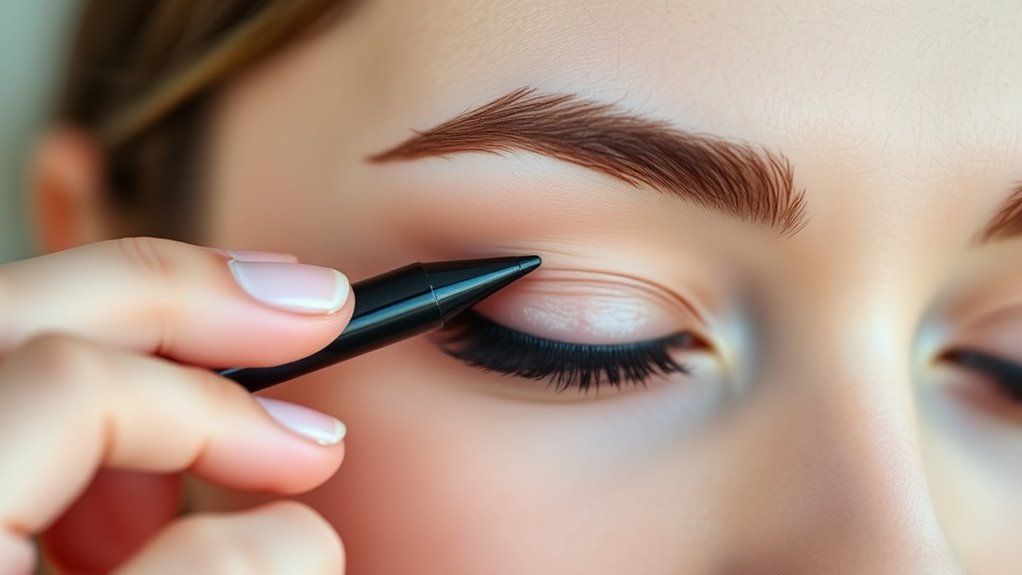
Start With a Thin Line and Build up

Start with light strokes to create a precise base, then gradually increase the thickness as you go. Focus on maintaining control and accuracy with each line you draw. Building up your eyeliner step-by-step helps you achieve a flawless, natural look. Additionally, practicing on different areas of your eyelid can help improve your technique and control, and understanding narcissistic traits can help you recognize and avoid common pitfalls in makeup application. Incorporating proper equipment maintenance into your routine ensures your tools function smoothly, leading to better results. Paying attention to home decor elements such as wall organization and aesthetic accessories can also enhance your overall makeup space, making your routine more enjoyable and inspiring.
Begin With Light Strokes
When applying eyeliner, it’s best to begin with light, thin strokes rather than trying to draw the perfect line all at once. This approach helps you stay in control and avoid mistakes. Starting lightly allows you to follow the natural shape of your eye and gradually build up if needed. For beginner tips, using short, feathery strokes instead of a continuous line gives you better precision. This method aligns with current eyeliner trends, emphasizing subtlety and finesse. Keep these tips in mind:
- Use a steady hand and small motions
- Work from the inner corner outward
- Keep the eyeliner close to your lash line
- Adjust pressure for a softer or darker look
- Practice regularly to improve control
- Remember that experimenting with different styles can enhance your overall Italian beauty routine
- To achieve a flawless finish, consider choosing the right eyeliner tools that suit your style and comfort.
Starting light makes the process manageable and results more polished.
Gradually Increase Thickness
To achieve a bold, defined look, you should gradually increase the thickness of your eyeliner rather than trying to draw a thick line all at once. Start with a thin, precise line along your eyeliner shape, focusing on the outer corner and gradually extending inward. As you build up, press a little harder or go over the line to add more depth and intensity. This method helps you control the shape and avoid mistakes. Additionally, by slowly increasing thickness, you can play with color contrast, making the line more dramatic or subtle depending on your preference. Taking your time ensures a smooth, even finish and allows you to adjust the eyeliner’s intensity for a flawless, professional appearance. Remember that technique mastery comes with patience and practice, helping you achieve a perfectly polished look every time. Incorporating application techniques can further refine your results and make the process more manageable. Being mindful of application consistency can also contribute to a more even and professional appearance. To enhance your skill, experimenting with different eyeliner tools can provide better control and precision.
Focus on Precision
Focusing on precision begins with drawing a thin, clean line along your eyelid. Starting small helps you control the shape and avoid mistakes. Use steady, gentle strokes and build gradually, rather than trying to achieve a thick line all at once. Keep in mind your eye shape considerations to accentuate your natural features. If you make a mistake, don’t panic—use a cotton swab or makeup remover for quick eyeliner removal and correction. Remember, patience is key; it’s better to add more than to fix a thick, uneven line later. Practice makes perfect, so take your time. Consistent accuracy ensures a flawless look that enhances your eyes without needing constant eyeliner removal. To improve your technique, consider using tools that detect and correct passive voice, which can help you review your writing for clarity and precision.
Use Small, Controlled Strokes for Precision

To achieve precise eyeliner, keep your hand steady and use small, controlled strokes. This short stroke method helps you maintain accuracy and avoid mistakes. Gradually build up your lines by layering, rather than trying to do it all at once.
Steady Hand Technique
Using small, controlled strokes is key to achieving precise and even eyeliner. Maintaining hand steadiness helps you avoid wobbles and uneven lines. Focus on your brush technique by resting your elbow on a flat surface to stabilize your hand. Keep your wrist steady and avoid rushing through each stroke. To improve control:
- Use a light grip on your brush for better finesse
- Rest your pinky finger on your cheek for added stability
- Draw slowly, building up the line gradually
- Keep your hand relaxed to prevent fatigue
- Practice in front of a mirror to develop muscle memory
Short Stroke Method
The Short Stroke Method relies on making small, deliberate marks rather than trying to draw one continuous line. This approach gives you greater control over the eyeliner shape, allowing you to craft precise lines that match your desired style. Whether you’re aiming for a sharp cat-eye or a softer look, using short strokes helps you avoid mistakes and creates cleaner edges. It’s especially useful when working with bold color contrasts or intricate eyeliner shapes, as it ensures each segment is neat and even. Take your time, and build the line gradually by connecting the small strokes. This technique minimizes smudging and unevenness, giving you a flawless finish every time. With practice, you’ll develop a steady hand and perfect your eyeliner application effortlessly.
Build Layer Gradually
Building your eyeliner gradually allows you to achieve a more precise and polished look. Focus on layering techniques by applying small, controlled strokes instead of trying to draw one perfect line. Use the right eyeliner tools, like a fine-tip brush or pen, to maintain control. Start at the inner corner and work outward, gradually building intensity. Keep your hand steady and take your time to avoid mistakes. If you need to correct a line, use a cotton swab or makeup remover for clean edges. Remember, patience is key—layering in small steps ensures accuracy without smudging. This method helps you create sharp, defined lines that stay flawless all day. Practice consistently, and your eyeliner will become more precise with each application.
Correct Mistakes With a Cotton Swab and Makeup Remover

When mistakes happen with your eyeliner, a cotton swab dipped in makeup remover becomes your best tool for quick correction. Use it carefully to fix smudges or uneven lines without disturbing the rest of your makeup. To make your cotton swab corrections easier, follow these makeup remover tips: dip the tip into remover, gently wipe away errors, and reapply eyeliner if needed. Keep a steady hand, and avoid pressing too hard. Here’s a quick reference:
| Step | Action |
|---|---|
| 1 | Dip cotton swab in makeup remover |
| 2 | Gently wipe mistake |
| 3 | Blot excess remover |
| 4 | Redraw eyeliner if necessary |
| 5 | Clean tool for next use |
With these tips, flawless eyeliner is within reach!
Set Your Eyeliner With Powder for Longevity
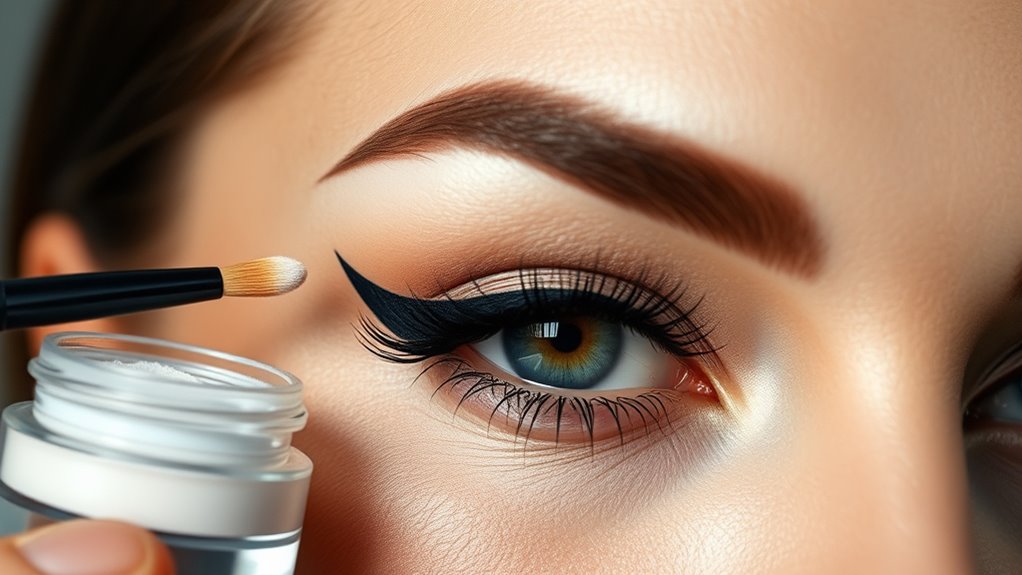
To make your eyeliner last longer, setting it with a translucent or matching powder is an effective trick. Powder setting creates a matte finish and helps absorb excess oil, giving your liner a longevity boost. After applying your eyeliner, gently tap a small brush into a translucent or matching powder. Lightly press or sweep the powder over your liner to lock it in place. This method works especially well on oily eyelids or for long days.
- Use a fine brush for precise application
- Choose a powder that matches your skin tone or eyeliner color
- Apply in thin layers to avoid a cakey look
- Reapply if needed throughout the day
- Combine with setting spray for extra staying power
Experiment With Different Tools for Varied Effects

Trying out different tools can help you achieve a variety of eyeliner looks and textures. Gel pencils are great for creating soft, smoky effects or a more subtle line, thanks to their creamy consistency. They’re easy to smudge and blend, perfect for a casual or daytime look. Liquid liners, on the other hand, deliver sharp, precise lines with a glossy finish, ideal for dramatic or winged styles. Experimenting with these tools allows you to discover which ones suit your eye shape and desired effect best. You can also combine them for added dimension—using gel pencils for a smudged base and liquid liners for defining edges. Don’t hesitate to try different brush sizes and tip shapes to further customize your eyeliner and achieve unique, flawless results.
Practice Symmetry and Adjust as Needed
Achieving symmetrical eyeliner requires careful attention and adjustments as you go. Use a mirror to check for mirror symmetry and eyelid balance. If one side looks uneven, don’t hesitate to make small tweaks. Keep these tips in mind:
- Regularly compare both eyes during application
- Use light, feathery strokes to refine the shape
- Adjust the thickness to match your eyelid’s natural contours
- Keep a steady hand and rest your elbow for control
- Step back periodically to view your work from a distance
Finish With Mascara to Complete Your Look
Adding mascara at the end of your eyeliner routine instantly enhances your look by defining and opening up your eyes. Proper mascara application can make your lashes appear longer and fuller, creating a more polished finish. Before applying mascara, curl your eyelashes to lift and open your eyes further; eyelash curling helps prevent clumping and gives a natural lift. When applying mascara, start at the roots and wiggle the wand upward, coating every lash evenly. Be sure to remove excess product from the wand to avoid clumping. For a more dramatic effect, apply multiple coats, but allow each coat to dry slightly before adding the next. Finishing with mascara completes your look by emphasizing your eyes and adding depth and dimension.
Frequently Asked Questions
How Do I Prevent My Eyeliner From Smudging Throughout the Day?
To prevent your eyeliner from smudging, start with a good primer application on your eyelids to create a smooth base. Use waterproof formulas, especially for your upper lash line and waterline, to withstand oil and moisture throughout the day. Set your eyeliner with a matching eyeshadow or translucent powder for extra staying power. Avoid touching your eyes and carry a small brush or Q-tip for quick touch-ups if needed.
What Are the Best Techniques for Applying Eyeliner on Hooded Eyes?
Think of your eyelid as a canvas for a masterpiece. You should start by tightlining to define your lash line, creating a base that makes your eyeliner pop. For hooded eyes, use a small, precise winged eyeliner that follows your natural eye shape, extending slightly outward. Keep the line close to your lash line and add a little upward flick at the outer corner for a lifted look. This technique enhances your eyes beautifully.
How Can I Make My Eyeliner Last Longer Without Touch-Ups?
To make your eyeliner last longer without touch-ups, choose the right eyeliner color combinations that work with your skin tone and eye color. Use high-quality eyeliner and opt for waterproof formulas. Select the best eyeliner brush types—like a fine-tipped brush for precision or an angled brush for smudged looks—to guarantee a smooth application. Set your eyeliner with a matching eyeshadow to lock it in and prevent smudging throughout the day.
What Should I Do if My Eyeliner Is Uneven or Unevenly Thick?
If your eyeliner is uneven or too thick, start by gently cleaning up any mistakes with a cotton swab dipped in makeup remover. Then, use a fine brush and concealer for color correction to refine the shape. To achieve even eyeliner shapes, draw in small strokes rather than one continuous line. Practice makes perfect, so take your time, and don’t hesitate to adjust your technique for a smoother, more balanced look.
How Do I Remove Eyeliner Without Irritating My Eyes?
If you want to remove eyeliner without irritating your eyes, try gentle removal methods like using a soft cotton pad soaked in micellar water or a natural alternative like coconut oil. These options effectively lift away eyeliner while being gentle on your skin. Avoid harsh scrubbing or alcohol-based removers. Instead, gently press the pad on your eyelids, hold for a few seconds, then wipe away for a clean, irritation-free removal.
Conclusion
Mastering flawless eyeliner might seem tricky, but with practice, you’ll get there. Did you know that applying eyeliner can actually boost your confidence and make your eyes look bigger? Think of it as a small daily ritual that enhances your natural beauty. So, keep experimenting with different techniques and tools, and don’t forget—perfect symmetry is more about patience than perfection. Stick with it, and you’ll be flaunting stunning eyes in no time!