To achieve symmetric brows, first identify facial landmarks like the inner eye corner, nose bridge, and outer eye corner. Use measuring tools and a brow pencil to mark the start, arch, and tail points, ensuring they align with your natural features. Connect these points precisely, then refine by removing stray hairs for a clean, balanced look. Mastering these techniques helps create natural, harmonious brows—keep going to discover more expert tips for perfect symmetry.
Key Takeaways
- Use facial landmarks like the nose bridge, inner eye corner, and outer eye corner to accurately mark brow start, arch, and tail points.
- Employ tools such as a brow pencil, measuring tape, and rulers for precise measurement and symmetry.
- Connect key reference points to create a balanced frame, ensuring the brow shape complements facial features.
- Mark lightly and verify symmetry by comparing both brows during the mapping process for consistency.
- Refine the shape by removing stray hairs and adjusting based on natural contours for natural, symmetrical brows.
precision brow mapping kit
As an affiliate, we earn on qualifying purchases.
As an affiliate, we earn on qualifying purchases.
Understanding the Basics of Brow Anatomy
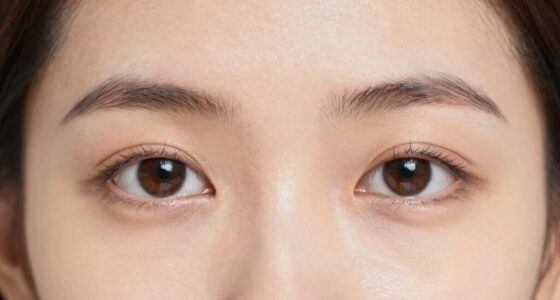
Have you ever wondered what makes up the perfect brow? Understanding the basics of brow anatomy is essential. Your brow structure relies heavily on brow muscle function, which controls movements like raising or lowering your eyebrows. These muscles connect to the skin, and their activity influences the brow’s shape and expression. Color accuracy also impacts how natural your brows appear, especially when matching brow makeup to your skin tone. Skin elasticity also plays a key role; flexible skin allows for smoother, more natural contours, making brow shaping easier and more precise. When the skin maintains its elasticity, it responds well to adjustments and minimizes sagging over time. Additionally, knowing about patch testing can help prevent adverse reactions when trying new brow products or treatments. Understanding skin elasticity can also aid in choosing the most suitable brow styling techniques for your skin type. Moreover, awareness of brow anatomy helps in planning precise and harmonious shaping strategies. Proper sensation and muscle control are essential in ensuring that brow movements remain natural and balanced. Knowing how these elements work together helps you achieve balanced, symmetrical brows. By understanding the underlying anatomy, you can better plan your brow shaping and ensure your results look natural and harmonious.
brow measuring tape
As an affiliate, we earn on qualifying purchases.
As an affiliate, we earn on qualifying purchases.
Tools Needed for Accurate Brow Mapping
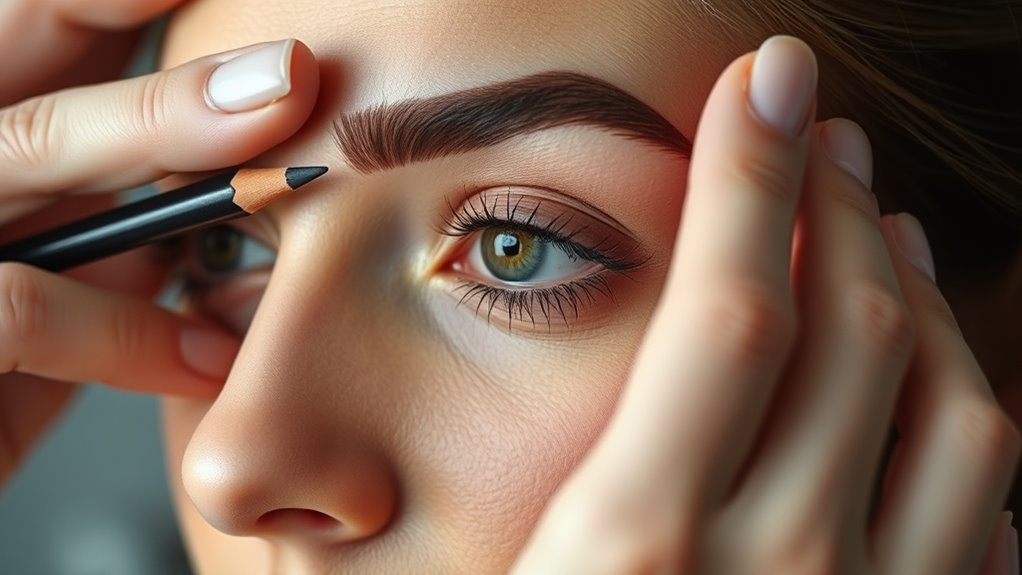
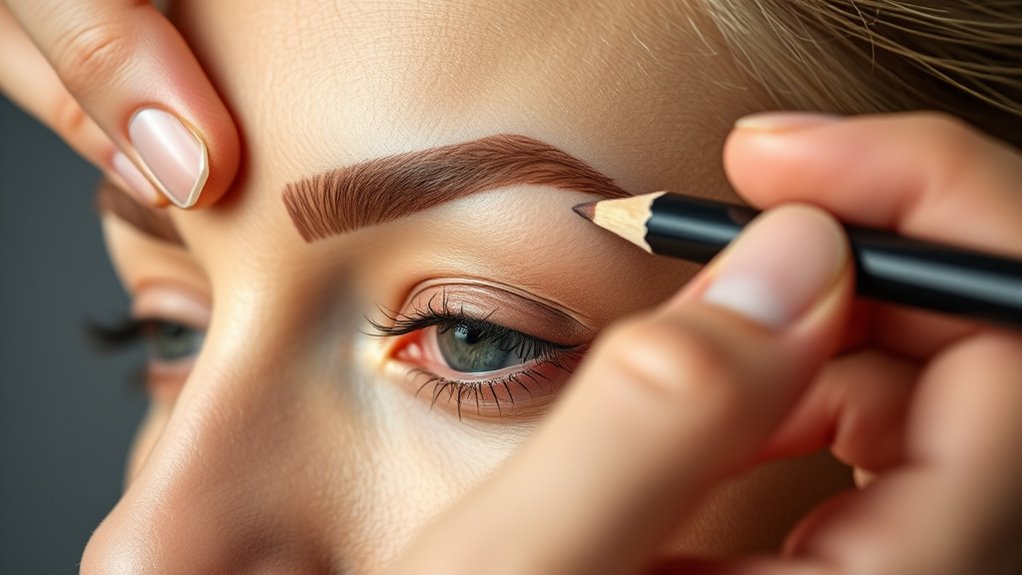
To achieve precise brow mapping, you need the right tools to measure and visualize the ideal shape accurately. A brow pencil is essential for lightly sketching the desired brow shape, ensuring symmetry before committing to any permanent changes. It helps you mark key points like the start, arch, and end of your brows. Using a measuring tape allows for precise measurements, enabling you to compare both brows and ensure evenness. Facial landmarks such as the bridge of your nose and the distance between your eyes are crucial for creating harmonious eyebrows. Use the tape to measure distances from your nose bridge and other facial landmarks, maintaining consistency. These tools help you create a clear plan, reducing guesswork and ensuring your brows complement your facial features. With a brow pencil and measuring tape, you set a solid foundation for achieving perfectly symmetrical and natural-looking brows.
brow pencil for symmetry
As an affiliate, we earn on qualifying purchases.
As an affiliate, we earn on qualifying purchases.
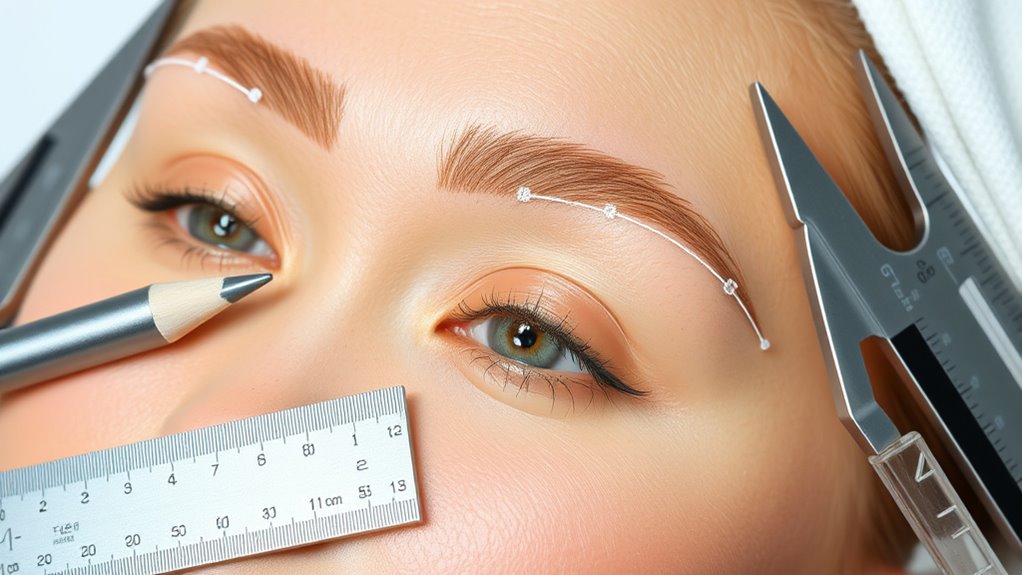
Identifying Your Natural Facial Landmarks

Identifying your natural facial landmarks is a crucial step in brow mapping because these points guide the overall shape and placement of your brows. By observing your facial features, you can enhance facial symmetry and highlight your natural features. Key landmarks include the inner corner of your eye, the outer corner, and the point where your brow naturally arches. Using a mirror, gently mark these points to develop a baseline for your brow shape. This process respects your unique facial structure, ensuring your brows complement your features. Understanding features of facial symmetry can further refine your brow design. Recognizing the importance of facial proportions helps in creating balanced and harmonious brows. Additionally, awareness of optimal angles for pinball machines can be metaphorically applied to achieving the right brow tilt for a more natural look. When setting these landmarks, consider how facial balance influences overall harmony and attractiveness. Being mindful of proportional relationships supports the creation of naturally appealing brows. Here’s a quick reference:
| Landmark | Location | Purpose |
|---|---|---|
| Inner Corner of Eye | Near the bridge of your nose | Defines the start of your brow |
| Arch Point | Highest point of your brow | Guides the arch placement |
| Outer Corner of Eye | Outer edge of your eye | Determines the brow’s end |
eyebrow shaping ruler
As an affiliate, we earn on qualifying purchases.
As an affiliate, we earn on qualifying purchases.
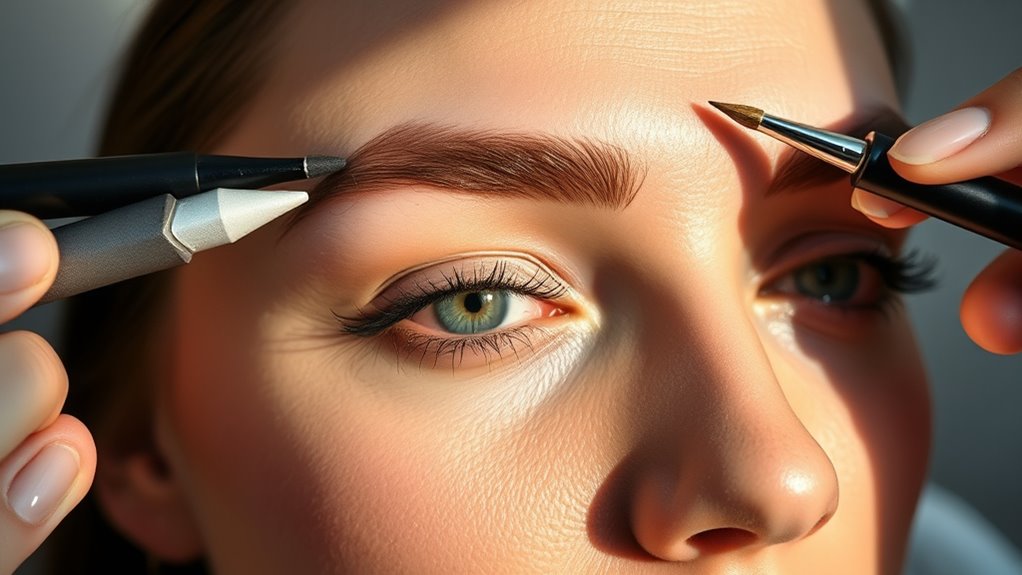
Marking the Starting Point and Arch of Your Brows

Marking the starting point and arch of your brows is essential for creating a balanced and natural look. Using precise marking techniques helps establish brow symmetry and ensures both brows complement your facial features. To find the starting point, hold a straight object vertically from the side of your nose to your inner eye corner. Mark this spot lightly with a pencil. For the arch, angle the straight object from the nose’s wing to the outer iris; the point where it intersects your brow is your ideal arch. These marks serve as guides, helping you shape your brows consistently. Accurate indication prevents over- or under-arching, maintaining harmony with your face. Additionally, understanding headphone compatibility can enhance your overall grooming and relaxation experience, especially when listening to tutorials or music during your routine. With careful attention, you’ll achieve a more polished, symmetrical appearance that enhances your natural beauty.
Determining the Tail’s Placement for Balance
To find the perfect tail placement, start by identifying your natural end point, which creates a foundation for balance. Next, check how this point aligns with your facial features, like the outer corner of your eye or the corner of your nose. This makes certain your brows complement your overall look seamlessly. Incorporating precise measurements can further enhance symmetry and ensure a harmonious appearance.
Identifying Natural End Point
Determining the natural end point of your eyebrows is essential for achieving a balanced and harmonious look. This point influences brow symmetry and enhances facial balance. To find it, imagine a straight line from your nostril to the outer corner of your eye. The natural tail should align with this line. Use a gentle pencil or brush as a guide. Proper placement ensures your brows complement your facial features, avoiding overly long or short tails. Additionally, considering precise brow mapping can help create a more tailored and symmetrical appearance. Moreover, considering bedroom decor can help create a relaxing environment that complements your overall aesthetic. Incorporating aesthetic principles into your grooming routine can further enhance facial harmony. Paying attention to facial proportions can also guide you in achieving balanced brow placement. To improve accuracy, using measurement techniques can help ensure your brows are proportionate and well-aligned. Here’s a quick reference:
| Landmark | Description |
|---|---|
| Nostrils | Starting point for measurement |
| Outer corner of eye | Alignment with natural brow tail |
| Facial symmetry | Enhances overall facial harmony |
Aligning With Facial Features
Once you’ve identified your natural brow end point, the next step is to make certain it aligns with your facial features for a balanced look. To achieve this, consider your overall facial symmetry and the shape of your eyebrows. Different eyebrow shapes complement various facial structures, so aim for the tail to extend naturally toward the outer corner of your eye or slightly beyond, depending on your preferred style. Use a ruler or brow mapping tool to ensure the tail lines up with the outer corner of your eye, creating harmony. Proper alignment emphasizes your natural features and ensures your eyebrows frame your face beautifully. Remember, consistent placement enhances symmetry and contributes to a polished, balanced appearance. Incorporating facial feature analysis can further refine your brow mapping process for optimal results, especially when considering facial proportions. Understanding how angel numbers relate to your personal growth can also inspire confidence in your styling choices. Additionally, utilizing AI tools can help analyze facial features more accurately for precise brow placement.
Connecting the Dots: Creating a Symmetric Frame
Start by marking your starting points on each brow to guarantee symmetry.
Then, establish the arch line to create a balanced curve.
Finally, connect these key reference points to form a precise, symmetrical frame.
To ensure your brow design remains consistent and safe, consider monitoring AI behavior, which is crucial for accurate and reliable results.
Marking the Starting Points
To create a perfectly symmetrical brow frame, you need to carefully mark the starting points of each brow. This step guarantees your brows will be balanced and harmonious with your face.
Start by identifying the point where your brow begins, aligning it with the outer edge of your nostril and the inner corner of your eye.
Use the following steps:
- Hold a straight tool vertically alongside your nose to mark the brow start.
- Ensure the brow shape complements your facial features, adjusting if needed.
- Match the color of your brow pencil or powder to your natural hair for seamless blending.
This precise marking guides your overall shape, helping you achieve symmetry and a natural look. Proper starting points set the foundation for a flawless brow design.
Establishing the Arch Line
Creating a symmetrical arch line is essential for achieving balanced and natural-looking eyebrows. To do this, carefully identify where the arch should peak, ensuring it aligns with your brow shaping goals. Use a pencil or brush to lightly mark the highest point of the arch, following your natural brow curve. This step guarantees your arch design complements your facial features.
| Step | Action |
|---|---|
| 1 | Identify the arch peak |
| 2 | Mark the point lightly |
| 3 | Confirm symmetry with the opposite brow |
| Tip | Benefit |
| Use a ruler | Precise arch placement |
| Check both brows | Balanced, natural look |
| Adjust as needed | Flawless arch design |
Connecting Key Reference Points
Connecting key reference points is essential for ensuring your eyebrows are symmetrical and well-proportioned. This step creates a clear frame, guiding your brow shape based on facial symmetry.
To do this effectively, identify three main points:
- The start point, aligning with the inner corner of your eye.
- The arch peak, positioned where your brow naturally curves.
- The end point, extending outward from the outer corner of your eye.
Drawing lines between these points helps visualize balanced eyebrow proportions, ensuring each brow complements facial symmetry. This connection forms the foundation for precise shaping, making sure both brows mirror each other perfectly.
When you connect these key points accurately, you enhance overall facial harmony and create a polished, symmetrical look.
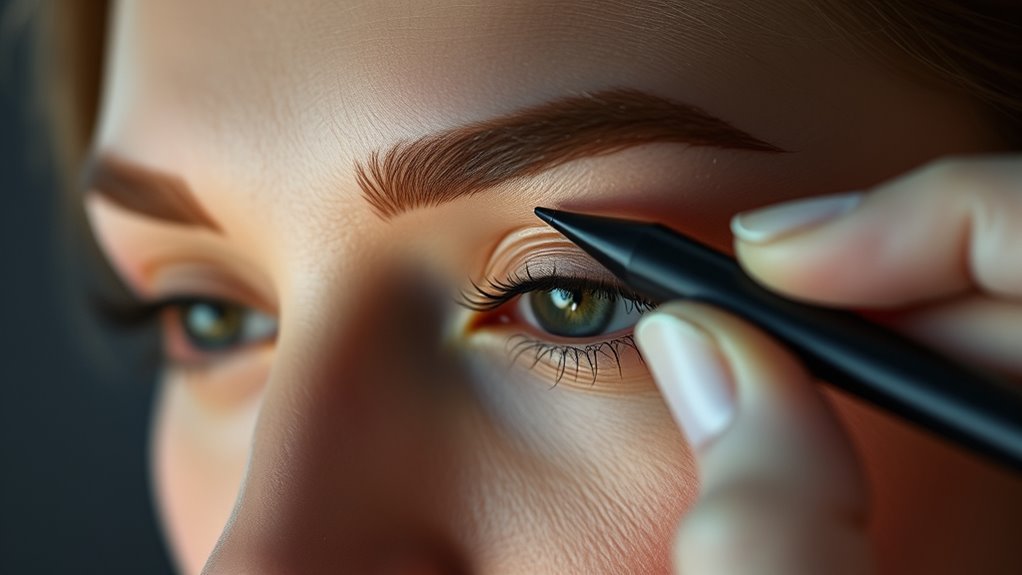
Refining Your Brows With Precision Techniques

Refining your brows with precision techniques involves careful attention to detail to achieve the perfect shape. Start by evaluating your brow shape and identifying areas that need adjustment.
Use precise brow shaping methods to define the arch and tail, ensuring symmetry. Hair removal techniques like tweezing, waxing, or threading help eliminate stray hairs that disrupt your ideal shape. Be steady and deliberate, removing only the hairs that fall outside your desired outline.
Use a small pair of tweezers for accuracy, and avoid over-plucking. Regularly step back to evaluate your progress, making incremental changes for natural-looking results.
This meticulous approach helps you sculpt brows that complement your features, creating a polished, symmetrical appearance.
Tips for Maintaining Symmetry During Regular Grooming
To maintain symmetry during regular grooming, it’s essential to develop a consistent routine and pay close attention to your brow shape each time you groom. Focus on balancing your brows by considering your natural features and personal style considerations. Here’s how to stay on track:
- Use a mirror and a brow pencil to mark key points—like the start, arch, and end—ensuring both brows align with your desired brow shape customization.
- Groom in good lighting, checking for symmetry after each pluck or trim, and adjust as needed to avoid over-grooming.
- Maintain a grooming schedule that respects your brow’s growth cycle, helping preserve symmetry and natural fullness.
Sticking to these tips helps keep your brows balanced and aligned with your personal style considerations.
Frequently Asked Questions
How Often Should I Revisit My Brow Mapping for Maintenance?
You should revisit your brow mapping every 4 to 6 weeks to maintain symmetry, especially if you get brow tinting or threading techniques done regularly.
As your eyebrows naturally grow, touch-ups help keep the shape and color looking fresh. Regular visits ensure your brows stay balanced and polished, so don’t hesitate to schedule maintenance appointments.
This routine keeps your symmetry intact and enhances your overall look effortlessly.
Can Brow Mapping Techniques Vary for Different Face Shapes?
Sure, your face shape definitely influences brow mapping techniques—who knew? If you have a round face, you’ll want straighter, more angular brows to create balance.
For a heart-shaped face, softer arches work wonders. Basically, tailoring your brow shape to your face shape guarantees better brow symmetry.
What Common Mistakes Should I Avoid During Brow Mapping?
You should avoid common pitfalls like rushing the technique, which leads to uneven brows. Don’t rely solely on visual symmetry; use precise measurements to prevent technique errors.
Over-mapping or skipping steps can distort the final look. Remember to double-check your markings and maintain consistency throughout.
Is Professional Help Necessary for Precise Brow Mapping?
You don’t necessarily need professional help for precise brow mapping, but it’s highly recommended. A skilled artist uses professional tools and has the expertise to make certain your brows are symmetrical and well-shaped.
They can accurately measure and mark key points, reducing mistakes and achieving the best results. If you’re confident in your skills, you might try it yourself, but for perfect symmetry, consulting a pro ensures a polished, tailored look.
How Do I Adjust Brow Mapping for Aging Skin?
To adjust brow mapping for aging skin, you should focus on enhancing brow elasticity and considering skin laxity.
Use gentle, precise measurements to account for sagging, and consider light, strategic shading or hair strokes to create a lifted appearance.
Stay mindful of natural contours and avoid over-structuring, which can emphasize aging signs.
Regularly revisit your mapping to adapt as your skin changes, ensuring your brows remain flattering and balanced.
Conclusion
Mastering brow mapping is like tuning a finely crafted instrument—you’ll find harmony with patience and precision. By understanding your facial landscape and following these steps, you’ll craft brows that mirror each other like perfect reflections in a still pond. Keep practicing, and your symmetry will become second nature, transforming your look with the finesse of an artist. Remember, every detail matters—your perfect brows are within reach, waiting to be revealed with confidence.