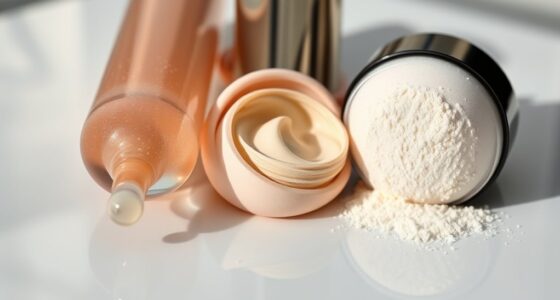

To layer cream and powder products seamlessly, start by preparing your skin with a clean, hydrated base and apply your creams using a damp sponge or brush for a smooth finish. Blend your creams well, working in small sections for natural-looking results. Then, lightly set with a matching translucent or matte powder to lock everything in and extend wear. For a flawless look that lasts, use techniques like layering powders, fixing any imperfections, and adjusting as needed—more tips await if you continue.
Key Takeaways
- Apply cream products first, blending seamlessly with damp sponges or brushes for a natural finish.
- Set each layer with a translucent powder to lock in moisture and enhance longevity before adding the next product.
- Use a light hand when applying powders to avoid disrupting the underlying cream layers.
- Choose compatible powder finishes (matte, luminous) to complement and enhance the cream products.
- Finish with setting sprays and subtle re-blending to ensure a smooth, long-lasting makeup look.

wet n wild Photo Focus Loose Baking Setting Powder, Highlighter Makeup, Fair to Medium & Tan Skin Tones – Translucent
A silky weightless setting powder with a touch of sheer coverage to set makeup for lasting wear
As an affiliate, we earn on qualifying purchases.
As an affiliate, we earn on qualifying purchases.
Preparing Your Skin for Layering

Before applying any cream or powder, it’s essential to start with a clean, well-prepped base. Achieving proper skin hydration is key; moisturize your skin to guarantee a smooth surface that holds products well.
When selecting a primer, choose one that suits your skin type—hydrating primers work best for dry skin, while mattifying primers suit oily skin. Primers help create an even canvas, reduce the appearance of pores, and enhance product longevity.
Make sure your skin is free of excess oil or dirt before applying primer, as this can affect how well your layers adhere. Taking these steps assures your makeup applies seamlessly and lasts longer, providing a flawless finish for layering cream and powder products.
Real Techniques Miracle Complexion Sponge, For Applying Liquid & Cream Foundation, Skin Tint & Concealer, Makeup Blending Sponge, Natural Finish, Latex-Free & Cruelty-Free
Miracle Complexion Makeup Sponge — Award-winning blending sponge for makeup delivers all-over blending for a lightweight, natural glow;…
As an affiliate, we earn on qualifying purchases.
As an affiliate, we earn on qualifying purchases.
Applying Cream Products Correctly

To apply cream products effectively, start by prepping your skin properly so they glide on smoothly. Use a damp sponge to blend the product seamlessly into your skin for a natural finish. Remember to work quickly and blend thoroughly to avoid harsh lines or uneven patches. Incorporating skincare exfoliation can enhance product absorption and result in a more even application.
Prep Skin Properly
Have you ever wondered why your cream products don’t blend seamlessly or last all day? The key is starting with a solid prep skin routine. Begin with a consistent hydration routine to ensure your skin is plump and smooth, which helps creams glide on effortlessly.
Next, focus on primer selection; choose a primer suited to your skin type and concerns. A hydrating primer works well for dry skin, while a mattifying one suits oily skin. Applying primer creates a smooth base, minimizes pores, and helps your cream products stay put longer.
Don’t skip this step—properly prepped skin provides an even canvas, enhances blending, and improves longevity. Investing time in prepping sets the stage for flawless application and a natural, long-lasting finish.
Use Damp Sponges
Using a damp sponge is essential for flawless cream application because it helps blend products seamlessly and prevents streakiness. The damp sponge enhances your layering technique by distributing cream products evenly across your skin, reducing excess buildup. Additionally, the use of a damp sponge aligns with popular sustainable materials in beauty tools, promoting eco-friendly practices. Incorporating consistent application techniques improves overall skin finish and minimizes patchiness. To achieve the best results, squeeze out excess water so the sponge is just slightly moist. This prevents the sponge from soaking up too much product, ensuring you deposit the right amount of coverage. When applying cream, use light, bouncing motions with the damp sponge, working from the center of your face outward. This method helps create a smooth, natural finish. Incorporating a damp sponge into your routine ensures your layer of cream products looks flawless and well-blended, setting a perfect base for powder application. Proper tool handling also contributes to achieving an even and professional-looking makeup result. Remember that product absorption can vary depending on the sponge material, so choosing the right one can enhance your application. Using a clean sponge regularly is also important to prevent bacteria buildup and maintain skin health.
Blend Seamlessly
Achieving a seamless blend of cream products requires patience and the right technique. To do this effectively, focus on color matching and brush selection. Use a clean, soft brush that suits your product type—dense for blending, fluffy for diffusing edges. Match your cream shades closely to your skin tone or desired look to avoid harsh lines. When blending, use gentle, circular motions to meld creams into your skin smoothly. Incorporating proper tools can also make a significant difference in achieving a flawless finish. Additionally, understanding layering techniques can help you build depth and dimension in your makeup application. Practicing consistent blending methods can further enhance your overall results and ensure a more natural appearance, especially when employing offensive security strategies to test your system’s resilience. Being familiar with product compatibility can prevent unwanted reactions and ensure your makeup stays fresh longer.

Rimmel London Stay Matte – 003 – Primer, Ultra-Lightweight, Controls Shine, Doesn’t Feel Greasy, 1oz
Skin perfecting
As an affiliate, we earn on qualifying purchases.
As an affiliate, we earn on qualifying purchases.
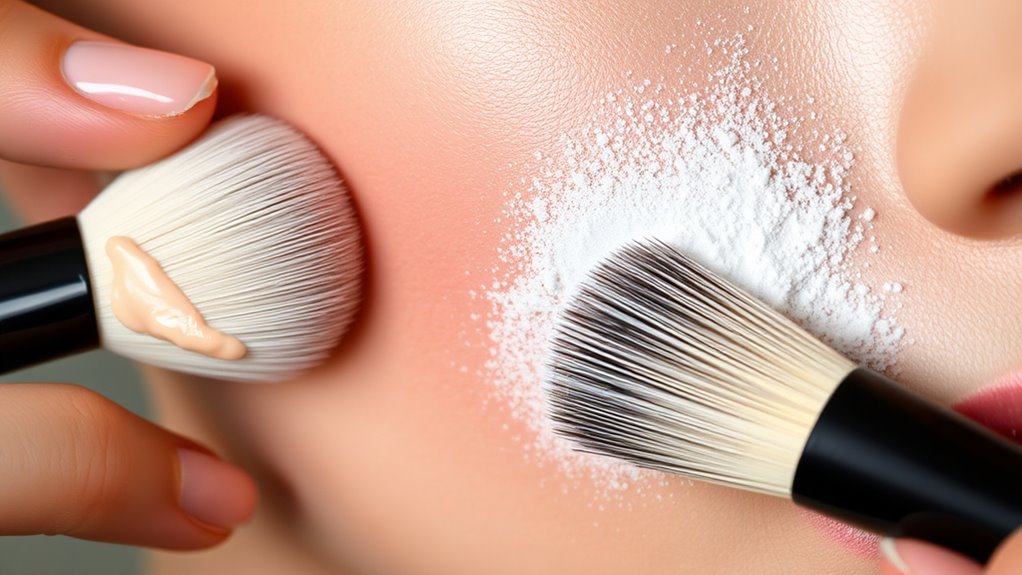
Blending Creams for a Seamless Finish

To blend creams seamlessly, start by using a damp beauty sponge to pick up and distribute product evenly. Work in small sections, gently tapping the sponge rather than rubbing, to avoid disturbing your base. This tapping motion helps create a smooth, natural finish without streaks or harsh lines. Incorporating adaptive learning technologies can help you better understand how different products interact with your skin for an even more flawless look. Additionally, paying attention to product compatibility ensures that your creams and powders work harmoniously for a flawless finish. Using the right type of applicator or tool can further enhance blending for a truly seamless appearance. When selecting tools, consider options that are recommended for skincare and makeup integration to optimize your application process.
Use Damp Beauty Sponge
A damp beauty sponge is essential for blending cream products seamlessly into your skin. It helps create a smooth, even texture contrast, ensuring your makeup looks natural and flawless. Using a damp sponge also activates product efficacy, allowing the creams to blend more effortlessly and reducing product waste. When you use a damp sponge, excess moisture prevents the product from applying too thickly, allowing for better control and a more subtle finish. The sponge also promotes color harmony, helping different shades blend effortlessly without harsh lines or patchiness. Proper tool selection, like a damp sponge, is supported by Personality Traits that favor adaptability and attention to detail, which can enhance your makeup application skills. Additionally, the sponge’s ability to pick up and deposit product evenly is tied to your technique and skill level, influencing the overall outcome. Recognizing relationship compatibility can also be beneficial in selecting the right tools and techniques that suit your personal style and preferences. Using the right technique, such as gentle bouncing motions, can further improve blending and create a more professional-looking finish. By gently bouncing the sponge over your skin, you can achieve a seamless progression between products, making your makeup appear more polished. Remember to squeeze out excess water before use, and work in light, patting motions to blend creams smoothly into your complexion.
Work in Sections Carefully
Working in sections guarantees you blend creams smoothly and avoid patchiness. Start by applying product to small areas, focusing on one segment at a time. This allows you to concentrate on color matching, ensuring the cream seamlessly blends with your skin tone. Incorporate patience and precision to achieve a flawless finish that looks natural and polished. Use the right brush selection—preferably a dense, soft brush for precise application and blending. Work quickly but carefully, blending outward to create a natural progression. Avoid overloading your brush to prevent harsh lines. As you move between sections, keep the edges soft to maintain a flawless finish. Staying organized and methodical helps you control the application, ensuring each section is perfectly blended before moving on.
This careful approach results in a smooth, cohesive look with no visible boundaries.
Tap, Don’t Rub
Have you ever noticed how rubbing can sometimes cause your cream products to streak or shift? Instead of harsh rubbing, use gentle patting techniques to blend your creams seamlessly. Light tapping helps distribute product evenly without disturbing the layers beneath. Incorporating proper blending techniques can help you develop a more intuitive blending method that works for your unique skin and product textures. By avoiding harsh rubbing, you reduce the risk of streaks and uneven patches, ensuring a smooth, natural finish. Keep your fingertips or a sponge soft and use a gentle touch to blend edges seamlessly into your skin. Patting techniques work especially well around delicate areas like the nose and under the eyes. Using the right tools, such as a damp makeup sponge or a soft brush, can enhance your blending results. Additionally, understanding merchants’ security risks can help you select tools and techniques that safeguard your skin and products from contamination. Remember, the goal is to blend for a flawless look, so take your time and be gentle. This approach guarantees your cream products meld beautifully with your foundation and powders, creating a polished, natural effect.

e.l.f. Hydrating Face Primer, Moisturizing Makeup Base, Smooths Pores & Fine Lines, Long-Lasting Wear, Preps Skin for Foundation Application, Small
DEEP HYDRATION BOOST: Infused with skin-conditioning ingredients, this hydrating face primer helps moisturize, soft, smooth, and prep skin…
As an affiliate, we earn on qualifying purchases.
As an affiliate, we earn on qualifying purchases.
Setting Creams With Powder Products

Setting creams with powder products can enhance your makeup’s longevity and guarantee a smooth, matte finish. To achieve this, choose powders that complement your cream textures—finely milled powders work best for a natural look. Lightly dust the powder over your cream products using a fluffy brush, focusing on areas prone to shine or creasing. This layering technique helps lock in moisture and set your makeup without heaviness.
| Cream Texture | Ideal Powder Finish |
|---|---|
| Creamy | Matte or semi-matte |
| Gel | Translucent or setting powder |
| Thick | Powder with a velvety finish |
This method ensures a seamless blend, preventing movement and prolonging wear throughout the day.
Choosing the Right Powder for Your Look

Choosing the right powder depends on your desired finish and the specific cream or gel products you’re using. Your choice of powder finishes can create different effects, from matte to luminous.
To get it just right, consider these steps:
- Select the powder finish that complements your look—matte for a velvety look, luminous for a glow.
- Pay attention to shade selection—match it to your skin tone for a natural finish or go a shade lighter or darker for contouring.
- Test different formulas to see which works best with your cream or gel products, ensuring seamless blending and longevity.
Techniques for Long-Lasting Wear

To guarantee your makeup stays flawless throughout the day, applying techniques that promote long-lasting wear is essential. Start with light highlighting techniques to add dimension without overwhelming your look, which helps your makeup stay fresh longer.
Incorporate color correction before applying foundation or concealer to neutralize redness or dullness, creating a smooth base that sets better.
When layering cream and powder products, set your cream products with a translucent powder to lock them in place. Use a gentle pressing motion rather than rubbing to avoid disturbing your makeup.
Setting sprays can also help, but make sure to choose a long-wear formula. These techniques work together to minimize fading and creasing, ensuring your look remains vibrant and polished throughout the day.
Tips for Fixing and Adjusting Your Makeup

Even with careful application, makeup can sometimes need quick adjustments to maintain a flawless look. To fix or tweak your makeup, start by evaluating what needs improvement.
- If your high points look dull, use a clean brush to reapply highlighting techniques, focusing on areas like cheekbones and brow bones.
- To redefine contours, gently blend contouring methods using a damp sponge or brush, softening any harsh lines.
- For areas that have become shiny or cakey, lightly dust a translucent powder to set and mattify.
These quick fixes help restore your makeup’s balance and dimension. Remember, subtle adjustments make a big difference in keeping your look polished and natural throughout the day.
Frequently Asked Questions
Can I Layer Different Brands of Cream and Powder Products Together?
Yes, you can layer different brands of cream and powder products. Just make sure to verify brand compatibility, as some formulas work better together than others.
Focus on color matching to ensure your makeup looks seamless and natural. Test small areas first to see how the products blend and stay, and use a setting spray to help everything stay in place.
With a little experimentation, you’ll achieve the perfect layered look.
How Do I Prevent Cream Products From Pilling When Layering?
Think of your makeup as a delicate dance—if your steps clash, the performance falters. To prevent cream products from pilling, guarantee product compatibility by choosing formulas with similar textures.
Use gentle, patting application techniques instead of dragging, giving each layer time to set. Allow your cream to fully absorb before adding powder. This careful approach keeps everything smooth and flawless, like a well-choreographed routine.
What Tools Are Best for Seamless Blending of Creams and Powders?
For seamless blending of creams and powders, you should use the right tools like brush techniques and blending sponges.
A dense, synthetic brush helps you blend creams smoothly without streaks, while a damp blending sponge is perfect for pressing powders into the skin for a natural finish.
Always work in light, circular motions and build coverage gradually. These tools make blending effortless and guarantee a flawless, even look.
How Often Should I Retouch Layered Makeup During the Day?
Think of your makeup as a garden that needs regular tending. You should do a midday refresh and touch up your layered makeup every 4-6 hours, depending on your skin type and activity level.
Keep a small kit handy with powder, blotting papers, and a brush, so you can maintain a fresh look without overdoing it. Regular touch ups help keep your flawless finish all day long.
Are There Specific Primers That Enhance Layering and Longevity?
Yes, certain primers are designed to enhance layering and longevity. Look for primers with compatible textures—silicone-based for smooth application under creams, or water-based for powders. These primers improve product adhesion, prevent creasing, and extend wear.
Always check the primer’s compatibility with your makeup products to guarantee seamless blending and a long-lasting finish, especially when layering cream and powder products together.
Conclusion
Mastering how to layer cream and powder products elevates your makeup game, creating a flawless, long-lasting look. When you understand the subtle art of blending and setting, it’s like your skin and products synchronize in perfect harmony—almost as if the universe conspired to help you shine. With patience and practice, you’ll find that your makeup not only looks stunning but feels effortless, turning every application into a moment of artful self-expression.