
To achieve perfect wings in just 30 seconds, start by grabbing a good quality eyeliner, a small piece of tape, and a mirror with good lighting. Mark the outer corner of your eye by imagining a line from the lash line to the end of your eyebrow. Use tape as a guide to draw a sharp line outward and connect it to your lash line. Fill in the wing, then tidy up with a cotton swab if needed. Keep practicing, and you’ll master this quick technique!
Key Takeaways
- Use a piece of tape or a card at the outer eye corner as a quick guide for a sharp wing.
- Mark the outer corner with a pencil or gel liner, aligning it with your brow end for symmetry.
- Sketch the wing outline with light strokes, connecting it to the upper lash line for a clean shape.
- Fill in the wing carefully, using guiding tape to ensure sharp, even lines.
- Remove the tape after completing the wing and smooth any edges for a flawless finish.
Gather Your Tools
To achieve a flawless eyeliner look, start by gathering all the essential tools. Your makeup tools make all the difference, so guarantee you have a good quality eyeliner, a clean brush, and a mirror with good lighting. Don’t forget eyelash curlers—they help open your eyes and create a more polished look before applying eyeliner. Using eyelash curlers correctly can make your eyes appear larger and more awake, providing a perfect base for your liner. Keep your tools organized in a makeup bag or tray so everything’s within reach. Having these essentials ready not only saves time but also ensures precision. Proper Kia Tuning can optimize your vehicle’s performance, just as proper tool preparation enhances your makeup application. Ensuring your tools are well-maintained, such as replacing worn-out headphone ear cushions, can make a significant difference in achieving a clean, precise line. When your tools are prepared, you’re set to master the perfect wing with confidence and ease.
Find Your Desired Wing Shape
Choosing the right wing shape begins with understanding your eye’s natural contours. Your eye shape influences which wing style will enhance your features best. For example, if you have almond eyes, you can experiment with various wing styles, from sharp to softly flicked. Hooded eyes benefit from a longer, slightly upward wing that lifts the eyes’ appearance, while round eyes look great with a wing that elongates and adds definition. Observe your natural eye shape and consider what you want to emphasize—whether it’s a dramatic flick or a subtle lift. Visualize different wing styles and how they complement your eye shape. This step helps you select a wing shape that enhances your unique features and makes your eyeliner look balanced and flawless. Additionally, understanding eye shape and style can help you choose the most flattering wing design, especially when considering narcissistic behaviors that influence personal style choices. Recognizing how your personal features interact with different styles can further refine your perfect wing. For example, being aware of facial proportions can guide you toward wing shapes that create harmony and balance with your overall features.
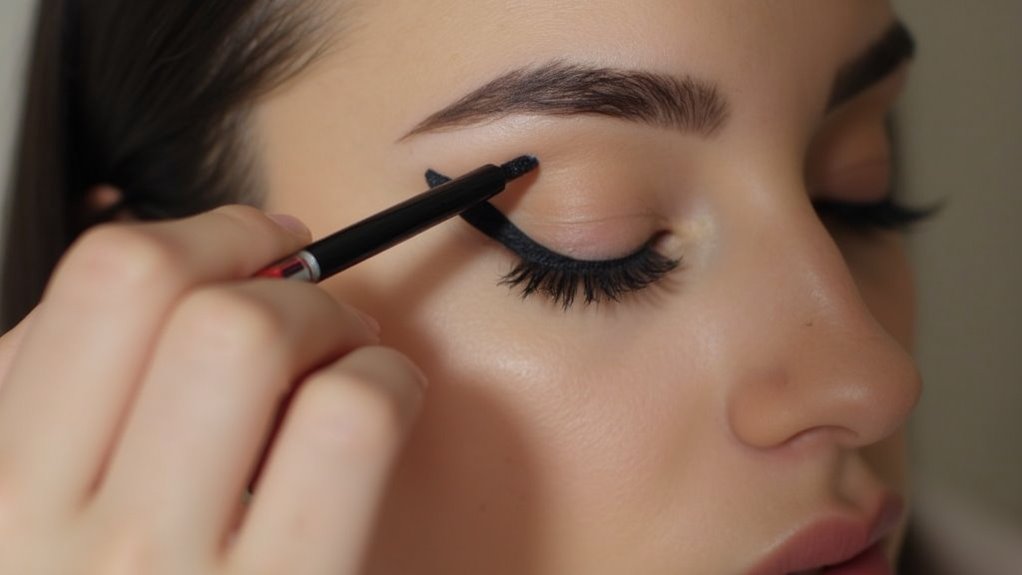
Mark the Outer Corner

Marking the outer corner of your eye is a crucial step in creating a balanced and polished winged eyeliner look. Focus on your wingtip placement by imagining a line extending from your lower lash line toward the end of your eyebrow. This helps guarantee your wing isn’t too short or too long. Use a pencil or a gel liner to gently mark the outer corner, aligning the tip with this imagined line. Keep the outer corner focus sharp and clean, avoiding any smudging or unevenness. This initial mark acts as a guide for the rest of your wing, ensuring symmetry and precision. Incorporating precision tools can further enhance your eyeliner application and help maintain symmetry. Additionally, maintaining an organized workspace allows for more efficient and accurate makeup application, especially when working on detailed steps like winged eyeliner. Understanding dog breeds can inspire creative and fun names for your pets, making your grooming routine more personalized. Paying attention to cookie and privacy policies can help you manage your online experience effectively while maintaining your privacy.
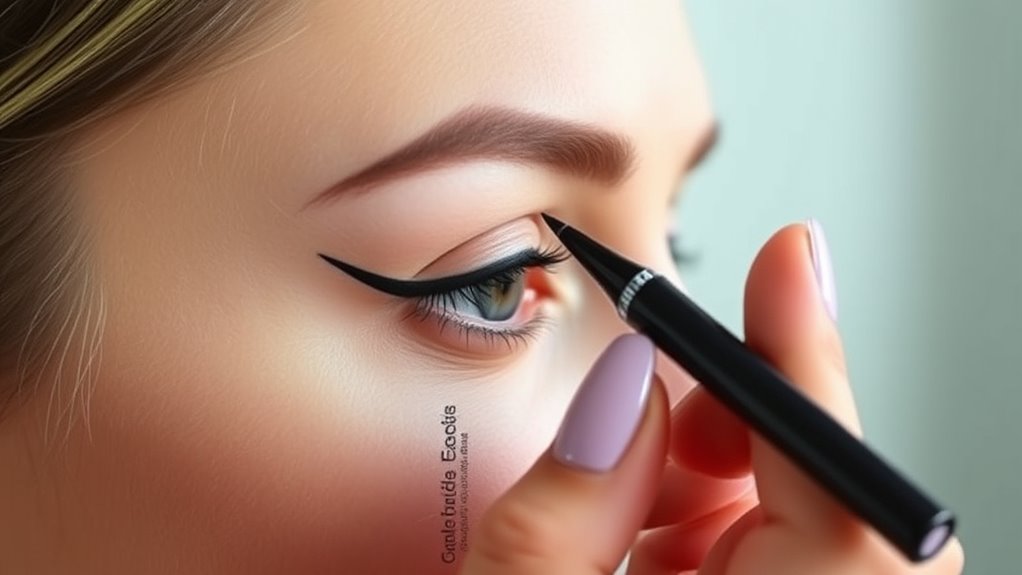
Create the Wing Outline

With the outer corner marked, it’s time to sketch the outline of your wing. This step traces back to eyeliner history, when bold, dramatic lines defined beauty trends. To create a precise shape, visualize your wing as a small triangle extending from the outer corner. Use light, feathery strokes to outline this shape, adjusting until it complements your eye shape. Here’s a visual guide:
| Step | Description |
|---|---|
| 1 | Mark the outer corner with eyeliner |
| 2 | Draft a thin line from the outer corner upward |
| 3 | Connect the tip of the line to the eyelid’s crease |
| 4 | Keep the outline thin and natural |
| 5 | Adjust until the wing matches your desired style |
This outline foundation combines classic eyeliner techniques with modern makeup trends, ensuring a flawless wing every time. For best results, consider practice and patience as key elements to mastering this quick hack. Additionally, choosing the right lighting conditions can help you see your work more clearly and achieve precision. Incorporating crochet tools into your makeup routine can also help in creating sharp and clean lines, much like their use in styling locs. In addition, understanding visualization techniques can help in planning and perfecting your wing shape before application.
Fill in the Wing

To fill in your wing, use a steady hand to stay precise and avoid smudges. Applying guiding tape can help you keep the line sharp and symmetrical. Focus on perfecting the outer corner to achieve a polished, confident look. Incorporating self watering plant pots skills can also help you access tutorials and tips for flawless application.
Steady Hand Technique
Achieving a clean, sharp wing requires a steady hand, and mastering the Steady Hand Technique is key. Many eyeliner myths suggest it’s purely innate, but understanding makeup psychology reveals that precision improves with practice and technique. To stabilize your hand, rest your elbow on a surface and breathe steadily. Focus on small, controlled movements rather than large strokes. Remember, your hand’s steadiness impacts the final look more than any myth about innate skill. Use the table below to reinforce this idea:
| Tip | Why it matters | How to implement |
|---|---|---|
| Rest your hand | Prevents shaky lines | Keep your hand supported on a surface |
| Use small strokes | Enhances control | Build the line gradually |
| Practice regularly | Builds confidence and steadiness | Dedicate time daily to eyeliner application |
Proper technique is essential for consistent results in makeup application.
Use of Guiding Tape
Using guiding tape is an effective way to create a precise, symmetrical wing. Place a small strip along the outer corner of your eye, angling it toward the end of your eyebrow. This helps you follow current eyeliner trends by achieving a sharp, defined wing every time. With the tape in place, apply your eyeliner along the lash line and extend it outward, using the tape as a guide. Once you lift off the tape, you’ll see a crisp, flawless line. If you make a mistake, don’t worry—use makeup removal to clean up any smudges quickly. Guiding tape minimizes errors and boosts confidence, making winged eyeliner easier for everyone. It’s a simple hack that guarantees perfect wings, even on days when perfection feels out of reach. Incorporating eyeliner techniques like this can also help you experiment with different styles and improve your overall makeup skills.
Perfecting the Outer Corner
Once you’ve mapped out your wing with guiding tape, the next step is to perfect the outer corner. Focus on shaping the outer corner to match your desired wing shape, whether it’s sharp, rounded, or winged. Use a small brush or eyeliner pen to carefully fill in or refine the outer corner, extending the line slightly beyond the guide if needed. Keep your hand steady and follow the natural curve of your eye to create symmetry. If the outer corner needs more definition, build the line gradually, ensuring it complements your eye shape. Remember, the goal is a clean, balanced outer corner that enhances your eye and aligns with your wing. Take your time to adjust until you’re satisfied with the wing shape.
Use a Tape or Card for Precision
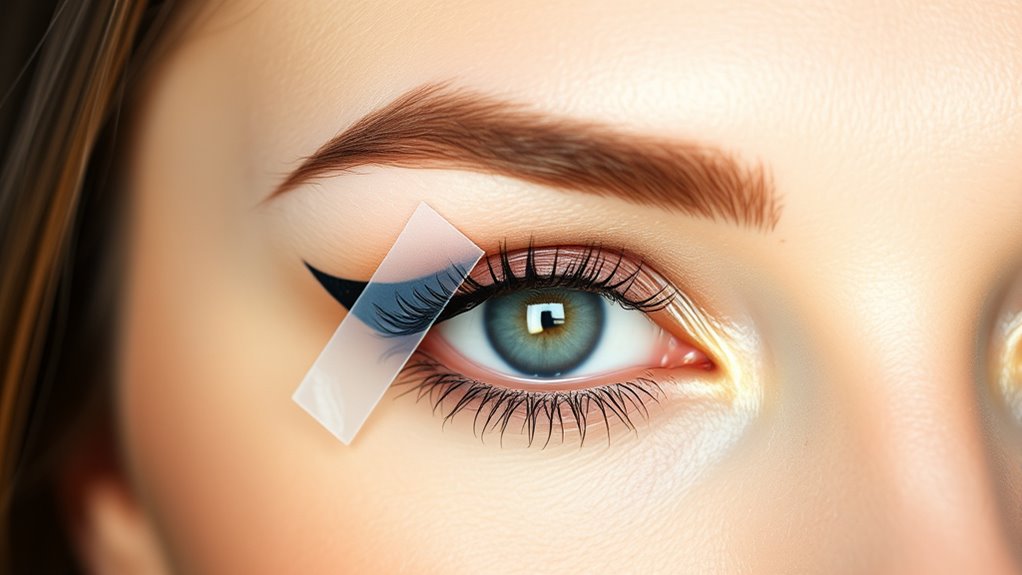
To get a sharp, clean eyeliner line, many people find it helpful to use a tape or a card as a guide. This simple trick aligns with current eyeliner trends and enhances your makeup artistry skills. Place a small piece of tape or a sturdy card at the outer corner of your eye, angling it toward the end of your brow. This creates a perfect guide for your wing, ensuring symmetry and precision. Keep your eyeliner pen or gel close to the edge of the tape or card, and draw along the edge for a crisp line. Once you remove the tape or card, you’ll see a flawless wing that elevates your look effortlessly. It’s a quick, effective method to achieve professional results every time.
Clean Up Any Mistakes
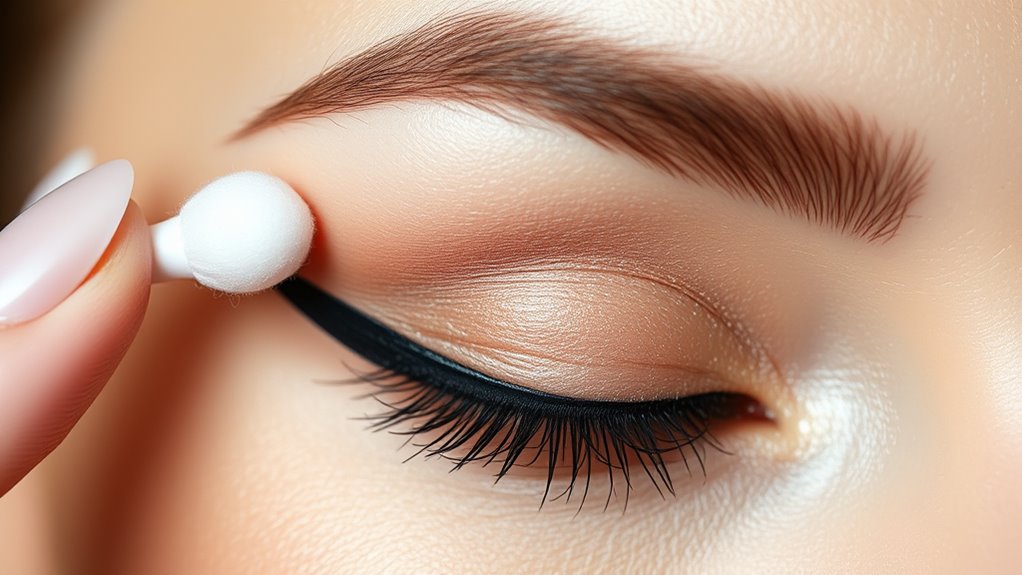
Even the most skilled makeup artists make mistakes, but you don’t have to worry—quick cleanup can salvage your look. If your eyeliner isn’t perfect, grab a cotton swab dipped in makeup remover or a little concealer to tidy up any smudges. This helps sharpen your wing and keeps everything looking sharp. While fixing your eyeliner, it’s a good time to check your blush application—if it’s uneven or too harsh, blend it gently for a natural glow. Also, use this moment to refine your eyebrow shaping. Filling in any gaps or correcting stray hairs with a spoolie or brow pencil will frame your eyes beautifully, complementing your eyeliner. Quick touch-ups like these ensure your makeup looks polished and flawless, every time.
Perfect the Line and Thickness
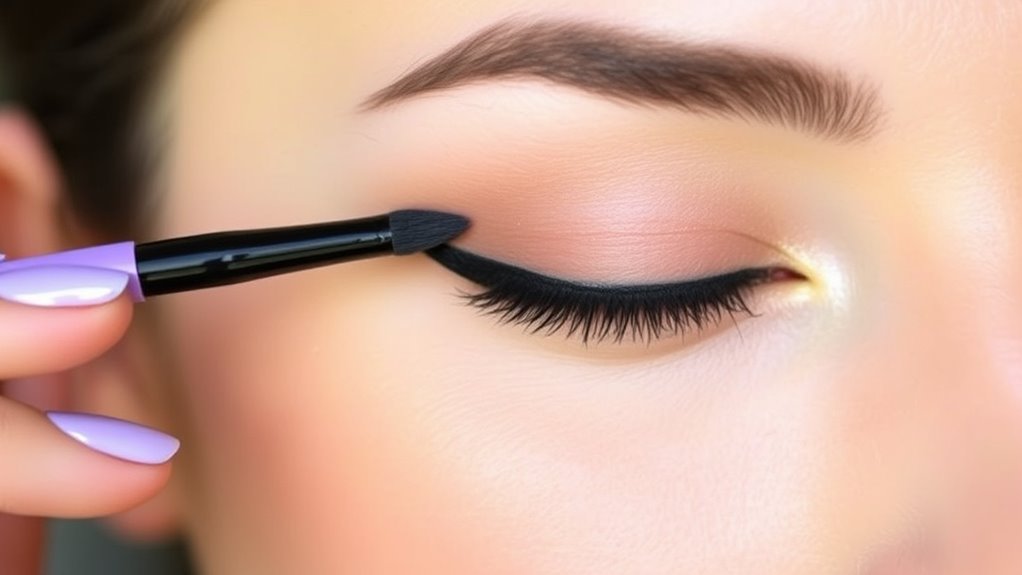
Achieving the perfect eyeliner line and thickness requires steady hands and a clear technique. Start by selecting the right eyeliner style that complements your eye shape and suits current makeup trends. For a bold look, opt for thicker lines, but keep them even by using short, controlled strokes rather than trying to draw one continuous line. To create a smooth, precise line, rest your elbow on a flat surface and steady your hand. Adjust the thickness gradually, starting thin at the inner corner and thickening toward the outer edge. Remember, consistent pressure is key. Practice different eyeliner styles like winged, cat-eye, or classic to find what works best for you and stays on trend. With patience, your eyeliner will always look sharp and balanced.
Final Touches for a Flawless Look

Once you’ve perfected your eyeliner line and thickness, the final touches can elevate your look to a flawless finish. Start by blending a touch of blush application on your cheeks to add a natural glow that complements your eye makeup. Proper skincare prep is essential—clean, moisturized skin guarantees your makeup stays put and looks smooth. After applying blush, double-check your eyeliner wings, making any minor touch-ups needed for symmetry. To finish, set your look with a light dusting of translucent powder or a setting spray, which helps prevent smudging throughout the day. These final steps enhance your overall appearance, giving you a polished, confident look that stays fresh and flawless from morning to night.
Frequently Asked Questions
Can This Hack Work for All Eye Shapes?
You wonder if this hack works for all eye shapes. It’s important to remember that eye shape compatibility varies, so some adjustments might be needed. Makeup artist tips suggest customizing wing placement and thickness for your unique eyes. While the hack offers a quick foundation, you’ll get the best results by adapting techniques to suit your eye shape, ensuring your wings look perfect every time.
What Eyeliner Types Are Best for This Method?
You should choose gel or liquid eyeliners for this method, as they offer excellent eyeliner durability and control, making wing shape adaptation easier. Pencil liners tend to smudge or fade quickly, reducing precision. Opt for a waterproof formula to guarantee your wings stay sharp all day. These types help you achieve a clean, defined look, perfect for adapting to different eye shapes and maintaining the perfect wing every time.
How Long Does the Wing Last?
Did you know that a well-applied wing can last up to 12 hours? For your wing’s longevity, choosing a waterproof or long-lasting eyeliner boosts durability. With proper application, you can enjoy your perfect wing all day without smudging or fading. Keep in mind, factors like oily skin or weather may affect the eyeliner’s durability, but with the right product, you’ll get maximum wing longevity and a flawless look that stays put.
Is This Technique Suitable for Beginners?
Yes, this technique is suitable for beginners. It offers simple eyeliner tips that make creating perfect wings quick and easy. With this beginner technique, you won’t need advanced skills or tools, just follow the steps, and you’ll get great results. It’s perfect if you’re starting out and want a reliable way to master eyeliner wings effortlessly. Give it a try and build your confidence with these easy eyeliner tips.
Can I Adapt This for a Smoky Eye Look?
You can definitely adapt this for a smoky eye look. Focus on blending techniques to create a seamless progression between shades, using a soft brush to smudge the eyeliner for a more diffused effect. Start with the winged liner and gently blend inward, layering darker shades for depth. This approach helps you achieve a sultry smoky eye while still maintaining the precision of the winged liner.
Conclusion
With this quick eyeliner hack, you’ll achieve perfect wings every time, saving you time and frustration. Did you know that 80% of people feel more confident with well-done eyeliner? Now, you can join that confident group and master the look in just 30 seconds. Practice makes perfect, so keep refining your technique. Before you know it, flawless wings will become your signature style, making every makeup routine faster and more fun!